

GALLERIA MALL GARAGE
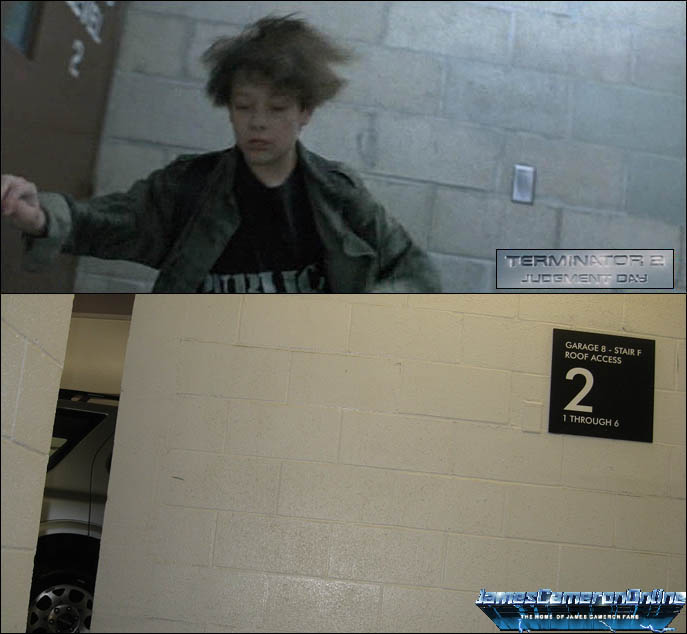
24. After witnessing the encounter between the T-800 and the T-1000, John is running for his life. As he races down the stairs to get to his motorcycle on the ground level, he passes the landing for parking level 2. One of the more significant changes to the Santa Monica Place parking structure is that all the doors to the stairwell have been removed. However, there are still details that identify the location. In the first pair of pictures, there is a metal plate on the wall. Note the position of the plate relative to the mortar lines between the bricks. Also, note that there are three full cinderblocks between the plate and the door/doorway. And of course, both shots are clearly labeled as being level 2.
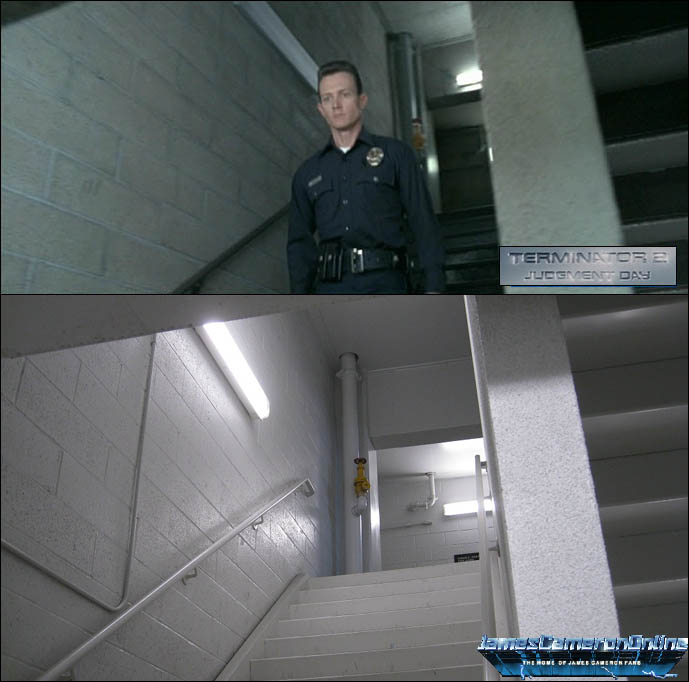
25. Here, the T-1000 is in pursuit. As it descends to parking level 2, some telltale similarities are visible. Of note are the pipes seen at the top of the stairs. The yellow-and-red emergency valve stands out particularly, and on the wall in the background is an L-shaped section of pipe with a straight section running below it. The handrail is also the same style. The lighting has been replaced over the years, but the replacement lighting was installed with the same philosophy in mind
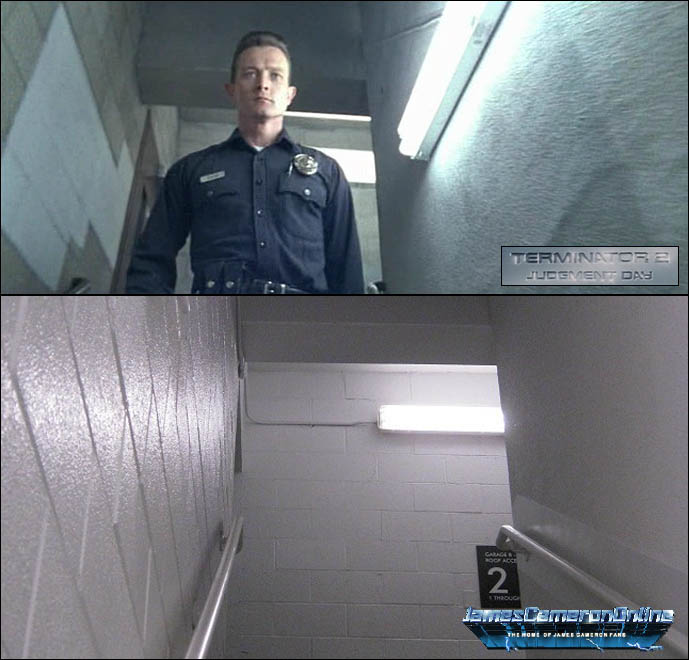
26. As the T-1000 approaches parking level 1, it passes the same level 2 landing that John did. Similarities include cinderblock on the left, and smooth wall on the right. The handrail seems to be the same style. Behind the T-1000's head, there is a concrete reinforcing beam that can be seen in the other photo.
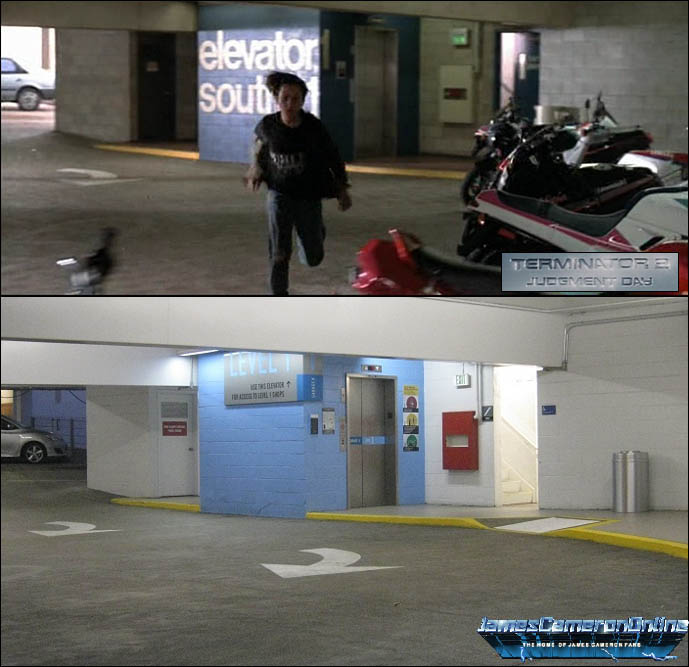
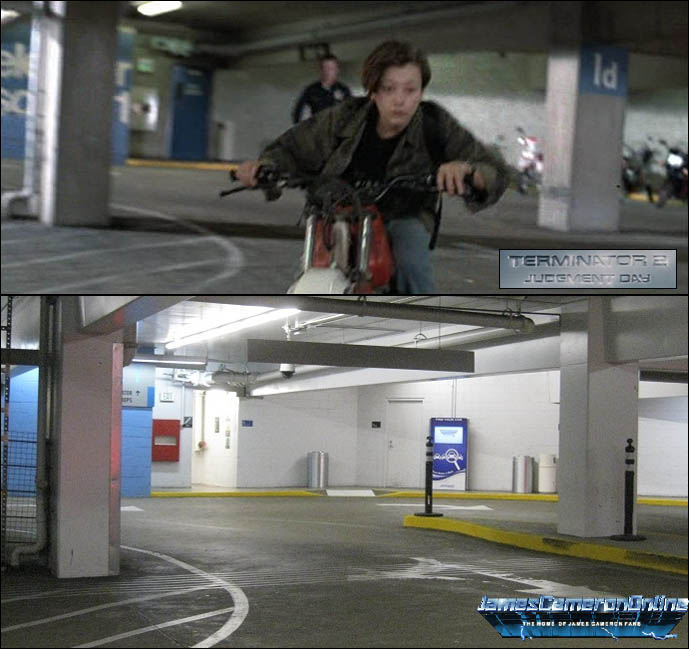
27. John has reached ground level, and heads straight for his motorcycle. There are many similarities here. The elevator is the same style. There's a utility room visible behind the elevator. The exit sign and fire hose cabinet are next to the elevator. The stairwell entry is in the correct place, though the door has been removed. The concrete structural beams are in the same positions, and even similar trashcans are used. Also, a 45-degree corner is evident along the cinderblock wall.
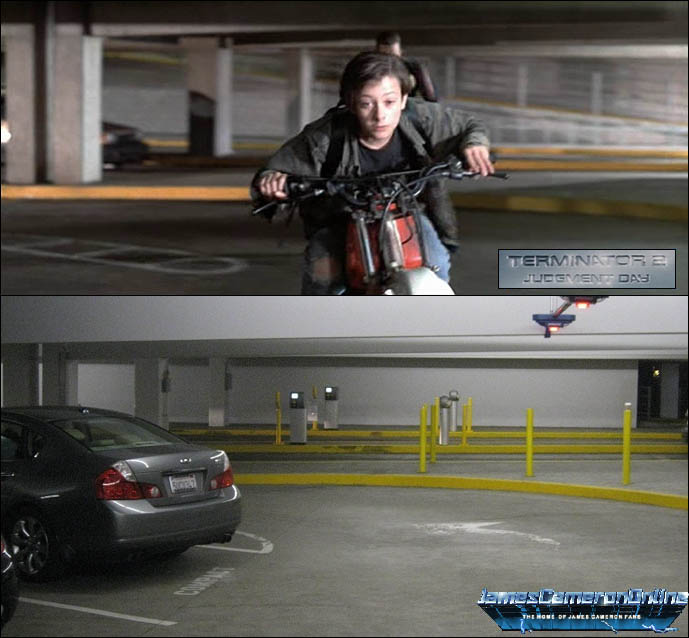
28. John gets his motorcycle started just as he is spotted by the T-1000, and begins to make his escape. A pillar behind him is visible in the modern-day shot, although a concrete island has been poured around it. To the left is another pillar with a vertical pipe attached to it. There are two 90-degree bends where it enters the floor. On the ceiling, a large pipe that goes to the stairwell entry is visible. The painted markings on the floor are similar, indicating the same parking layout. The utility doors can be seen in the shot, and a beige trash can is present. Barely visible on the left pillar are cables used as fencing. They can be seen clearly in the modern-day photo.
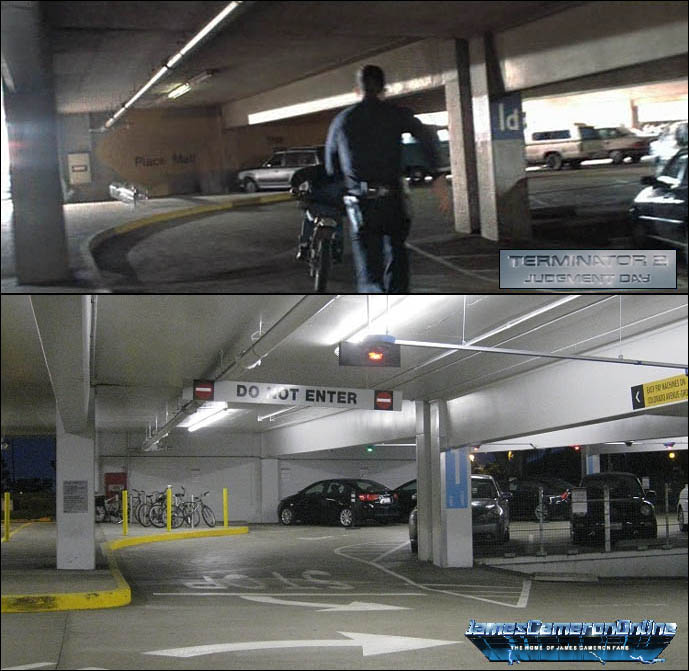
29. In this shot, the concrete reinforcing beams and pillars are laid out the same. There's a large pipe suspended from the ceiling. The island with the bicycle parking has the same shape. By the bicycle parking, a fire hose cabinet is visible with a vertical pipe coming out of the right side. To the left of the cabinet, a large vertical pipe is visible in the corner. Road markings are very similar, and the exit to the parking structure is visible to the far left. The cables used as fencing are visible to the far right, and the parking levels are sloped the same. Signs in both shots confirm that the shots were filmed on parking level 1.
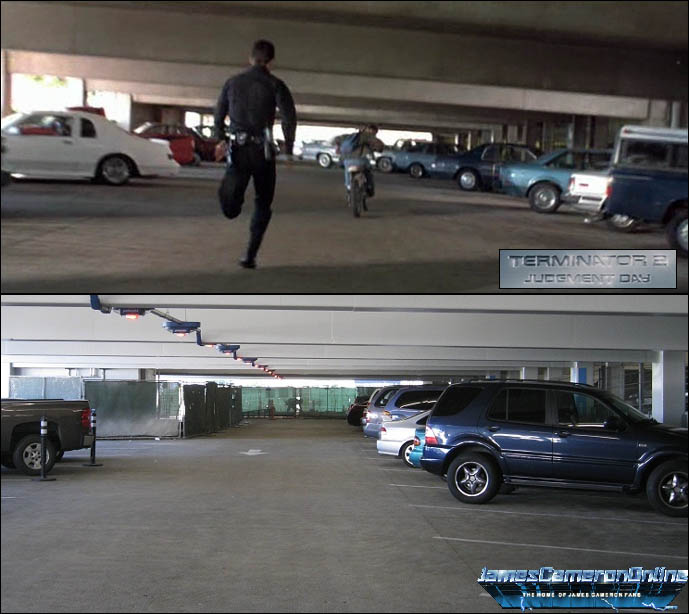
30. In the years since T2 was filmed, a wall was erected that separates the entry from from the exit lanes. In the movie, the entry ramp is clearly visible. But in the modern day shot, the only visible sign of it is the end of the metal fence just peeking out of the right end of the wall. The layout of the curbs is the same, and there are three pillars to the left side of the photos, with a pipe running vertically along the closest pillar, which is double-width.
TRUCK CHASE - SHIRLEY AVE
31. An important note about
the following comparisons: After T2 was filmed, an earthquake caused major
damage to the Northridge Fashion Center. Although at first glance the rebuilt
mall looks similar to what is seen in T2, the layout of stores and parking
structures is drastically different. Because of this, the mall cannot be used as
reference for the comparison shots. All details noted in the comparisons will be
on the west side of the street--not the east side of the street where the mall
is.
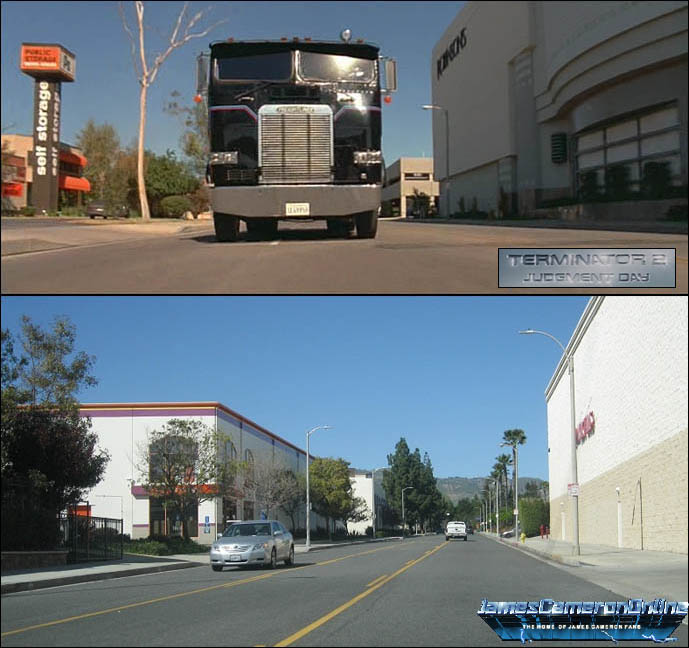
The chase took place on Shirley Avenue. Shortly after John Connor makes it onto
Shirley Avenue, the T-1000 does so as well. In the process, it acquires a large
tow truck. Visible on the left is a Public Storage facility. While it's
obviously been remodeled, there is no reason to believe that it has been
relocated. On the right side however, the Robinsons building is now a movie
theater.
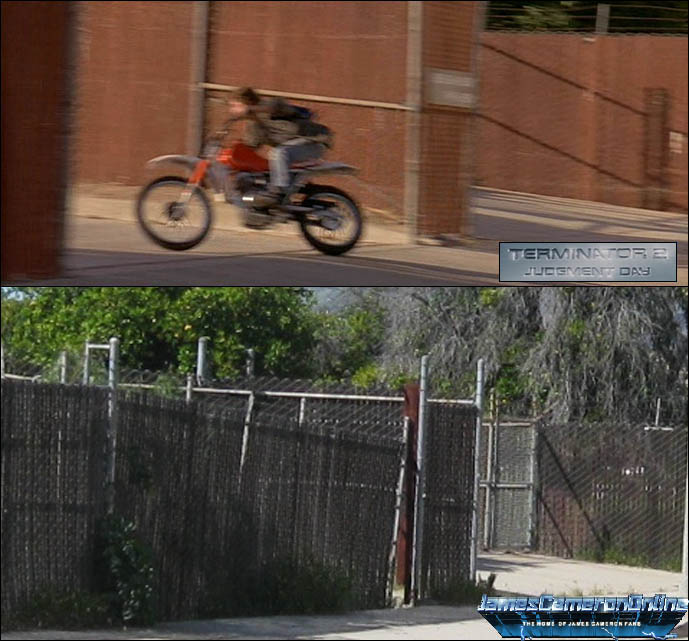
32. As John races south on Shirley Avenue, we see the street from his perspective. Between the streetlamp and the fire hydrant, there is a driveway that coincides with an interruption in the fence. In the background, a bridge is visible. It looks like a freeway overpass, but it's actually a bridge that goes over a drainage canal and a railroad track. In the modern-day photo, there's a section of sagging fence that is actually the gate John Connor rides through. In the movie it was open, but normally it is closed. Despite what the movie depicts, there is no drainage canal on the other side of that gate.

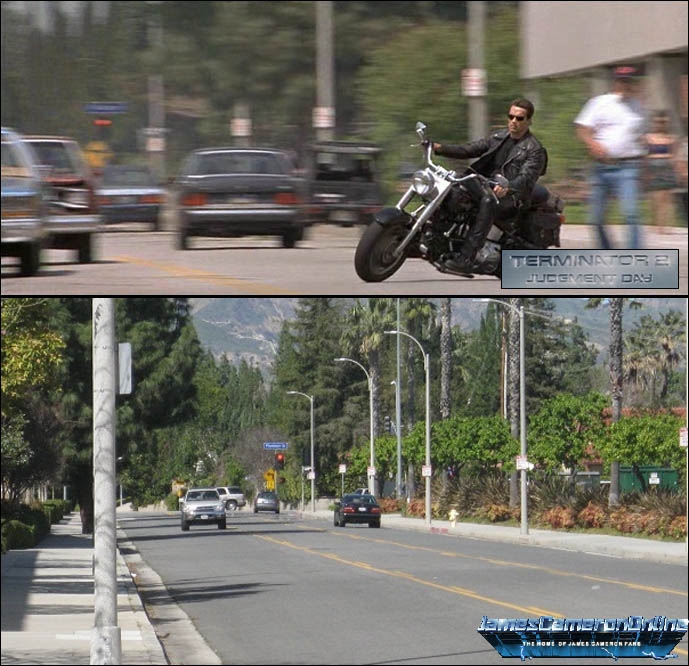
33. The T-800 pulls out onto the street to join the chase. The modern-day shot shows the approximate location where the Terminator pulled out onto the street. Visible in the background is the traffic signal for Plummer Street. Just beyond the traffic signal is a yellow caution sign, indicating the left turn from Shirley Avenue onto Ballinger Street. In T2, there are five streetlamps between Plummer Street and the driveway the T-800 pulls out from, although the fifth is not visible in the included screenshot of T2. All five streetlamps are visible in the modern-day shot, and the driveway the T-800 pulls out from is just barely visible.
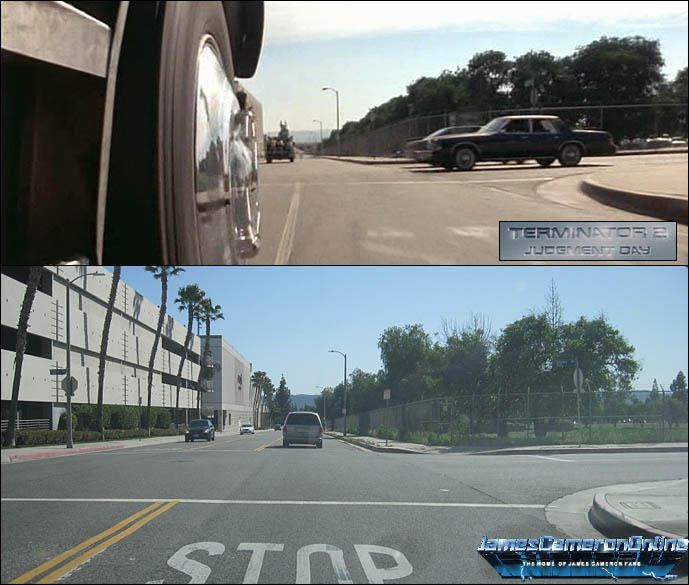
34. Halfway down the street, the T-1000 reaches the intersection of Shirley Avenue and Prairie Street, plowing through cross traffic as it passes through. The following shots are from right before the crash. Just past the intersection on the right is chainlink fence with barbed wire on the top, and trees behind it. There is a no parking sign at the corner, and beyond that are two streetlamps. Also some trivia: The vehicle in front of the tow truck is the camera crew filming the crash we see in the next shot of the film. If one freeze-frames the next shot of the film (no screenshots included here), the unmanned camera used to film from the perspective of the truck is barely visible just ahead of the rear wheels of the truck.
35. John Connor leaves the street to get to what he thinks is the safety of the drainage canals. John Connor goes through the open gate. The closed gate, which is sagging considerably, is clearly visible in the modern-day shot. Like the freeway chase near the end of the movie, James Cameron used the layout of the street pretty much as-is for the chase. Significant elements appear in roughly the same order in the movie as they do in reality.
TRUCK CHASE - FLOOD CANAL
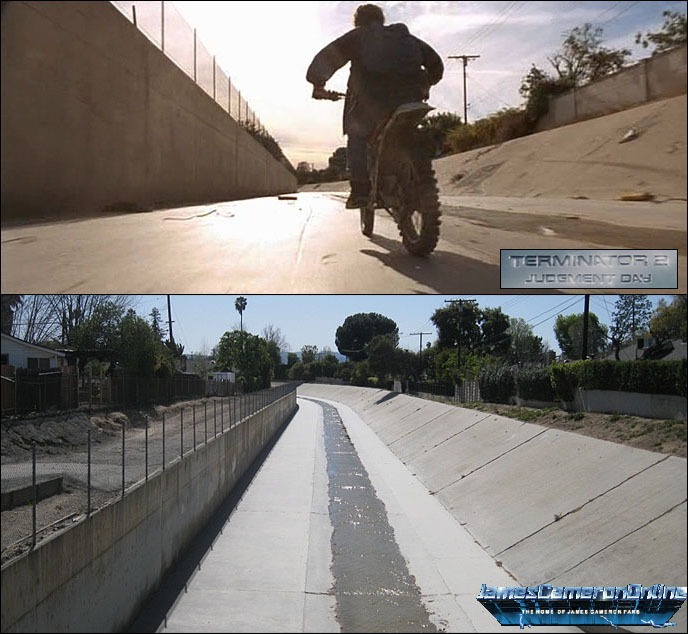
36. After entering the drainage canal, John thinks he's safe, so he stops for a moment to calm down. The wall to the left is vertical, with a small chainlink fence on top. The right side of the canal has a shallow slope. Ahead, the canal curves to the left. To the right is a power pole with a transformer attached. In the modern-day shot, the power pole is in front of a tall tree, making it difficult to see the transformer, but it's there.
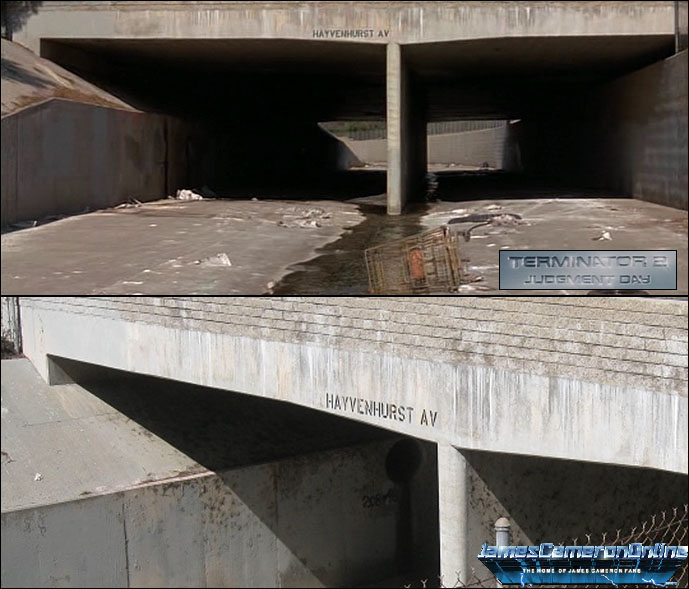
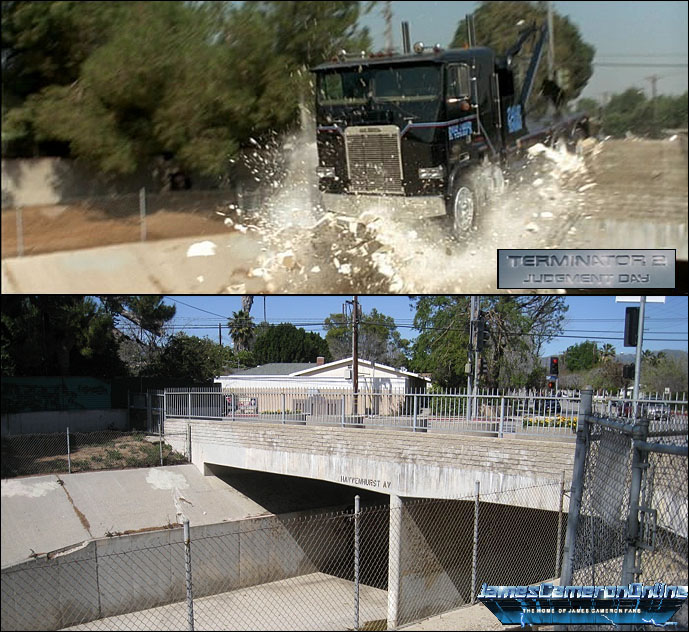
37. John soon finds out that he's not safe yet. After hearing the skidding of tires, the large tow truck comes crashing into the canal. The brick wall is similar, but it's clearly taller than in the modern day shot. This was done so they could do the stunt without damaging the real wall. Ramps were used to get the truck high enough to clear the real wall and break through the breakaway wall built on top of it. In the background traffic signals and some distant power poles are somewhat visible.
38. John is riding for his life, but he's not in this alone. Help is on the way. The T-800 forces its way onto a service road that parallels the drainage canal.

39. Chainlink fence separates the wooden back fences of the adjacent properties from the service road. Some rather shoddy asphalt work can be seen at the base of the fence.

ALLEY TALK
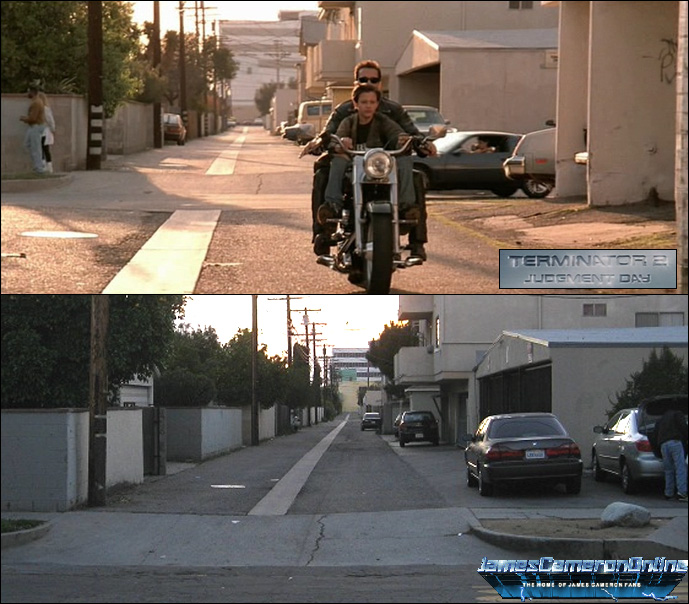
40. T-800 drives into the alley per John's request. Note the similarities in the layout of the curb, sidewalk, and driveway. The closest garage is completely open in the movie, but in the modern-day shot it is fenced in. Some additional garage doors match, and in the foreground there is a very distinctive crack in the driveway. Looking carefully, another distinctive crack is just barely visible on the sidewalk.

41. The T-800 is about to stop. The garage is now easy to compare, and the apartments behind it are the correct style. There's even a pipe on the side of the apartment building that's in the correct spot. More of the crack in the driveway can be seen, and it's possible to see all the way to the end of the alley. The same white building with the dark windows is visible, and the modern-day shot reveals something that wasn't obvious in the movie. There's another building in front of the white building. That's why the lowest level of windows wasn't as wide as the upper levels. Other matching details include the wall for the corner house across the street, and a power pole right at the corner behind the wall.
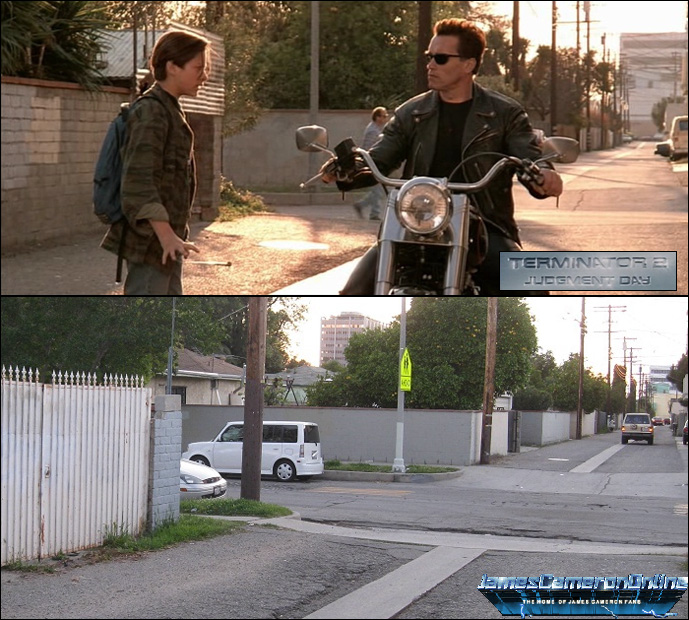
42. John tries to handle being face-to-face with aTerminator. There's a light pole across the street in the correct location. The wall behind John has changed considerably, though the bricks on top of the wall appear unchanged. At the far end of the gate, bricks can be seen that seem to match the wall seen in T2. On the ground is a manhole cover.
A bit of trivia: That building that is blocking the tall, white building in the background is actually next door to the bank used for the ATM scene. The building is visible in the background while John is hacking the ATM.
All photos and descriptions by David Drummond
Edited by Adrian Czarny